Setup
Before configuring your webhook on your dashboard, ensure you have a working endpoint. If not, follow our example here. Then, you can log in to your dashboard.
Go to the settings page by clicking the gear icon at the left menu of the page.
How to setup a webhook from your Dashboard
In summary:
- To access the Settings page, click on the gear icon located in the left menu of the page.
- Select the "Webhooks" section from the left menu.
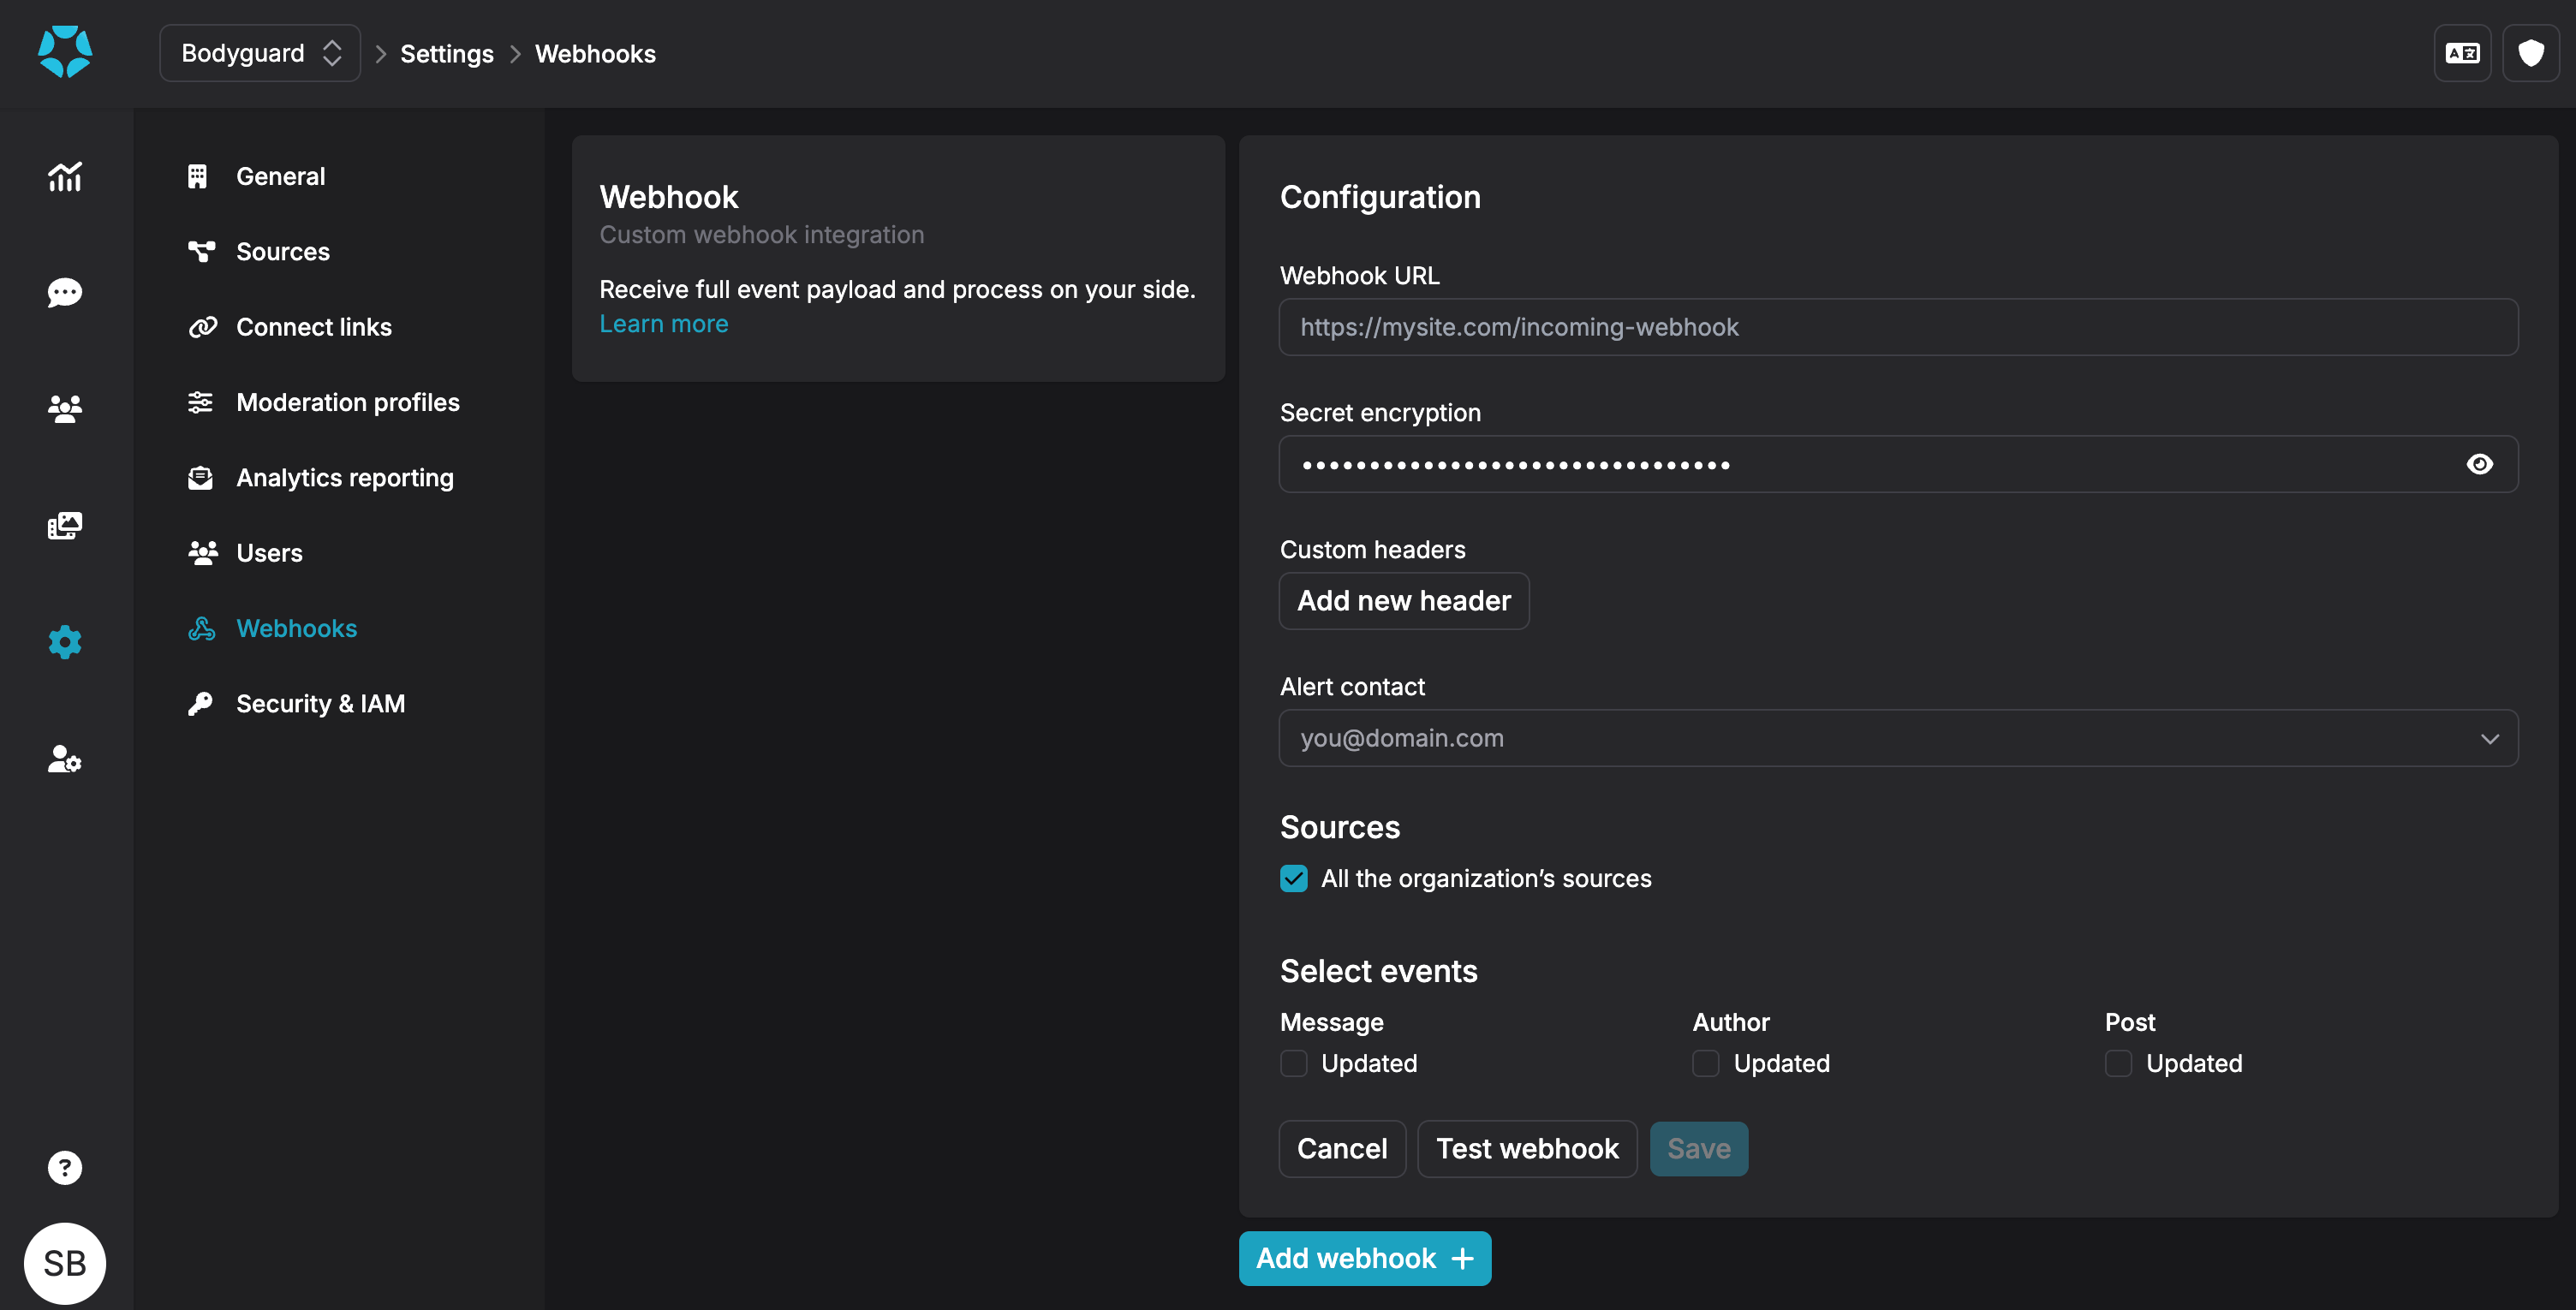
- From the Webhook configuration page, click on "Add webhook +". This will open a new configuration form.
You can find more information about each fields on the following sections:
Note that the secret encryption is automatically generated. You can either set your own, or generate new ones using the "generate" button.
Before registering, you must test the webhook by clicking the Test integration button. This will trigger a test notification (see the challenge section).
If everything goes well, the Enable integration button will become available.
Once done, your webhook is now ENABLED, and ready to receive notifications. See webhook statuses section for more information.
Example
Here is an example of a webhook that directs to a specific URL. This URL will receive notifications on updates of Message:
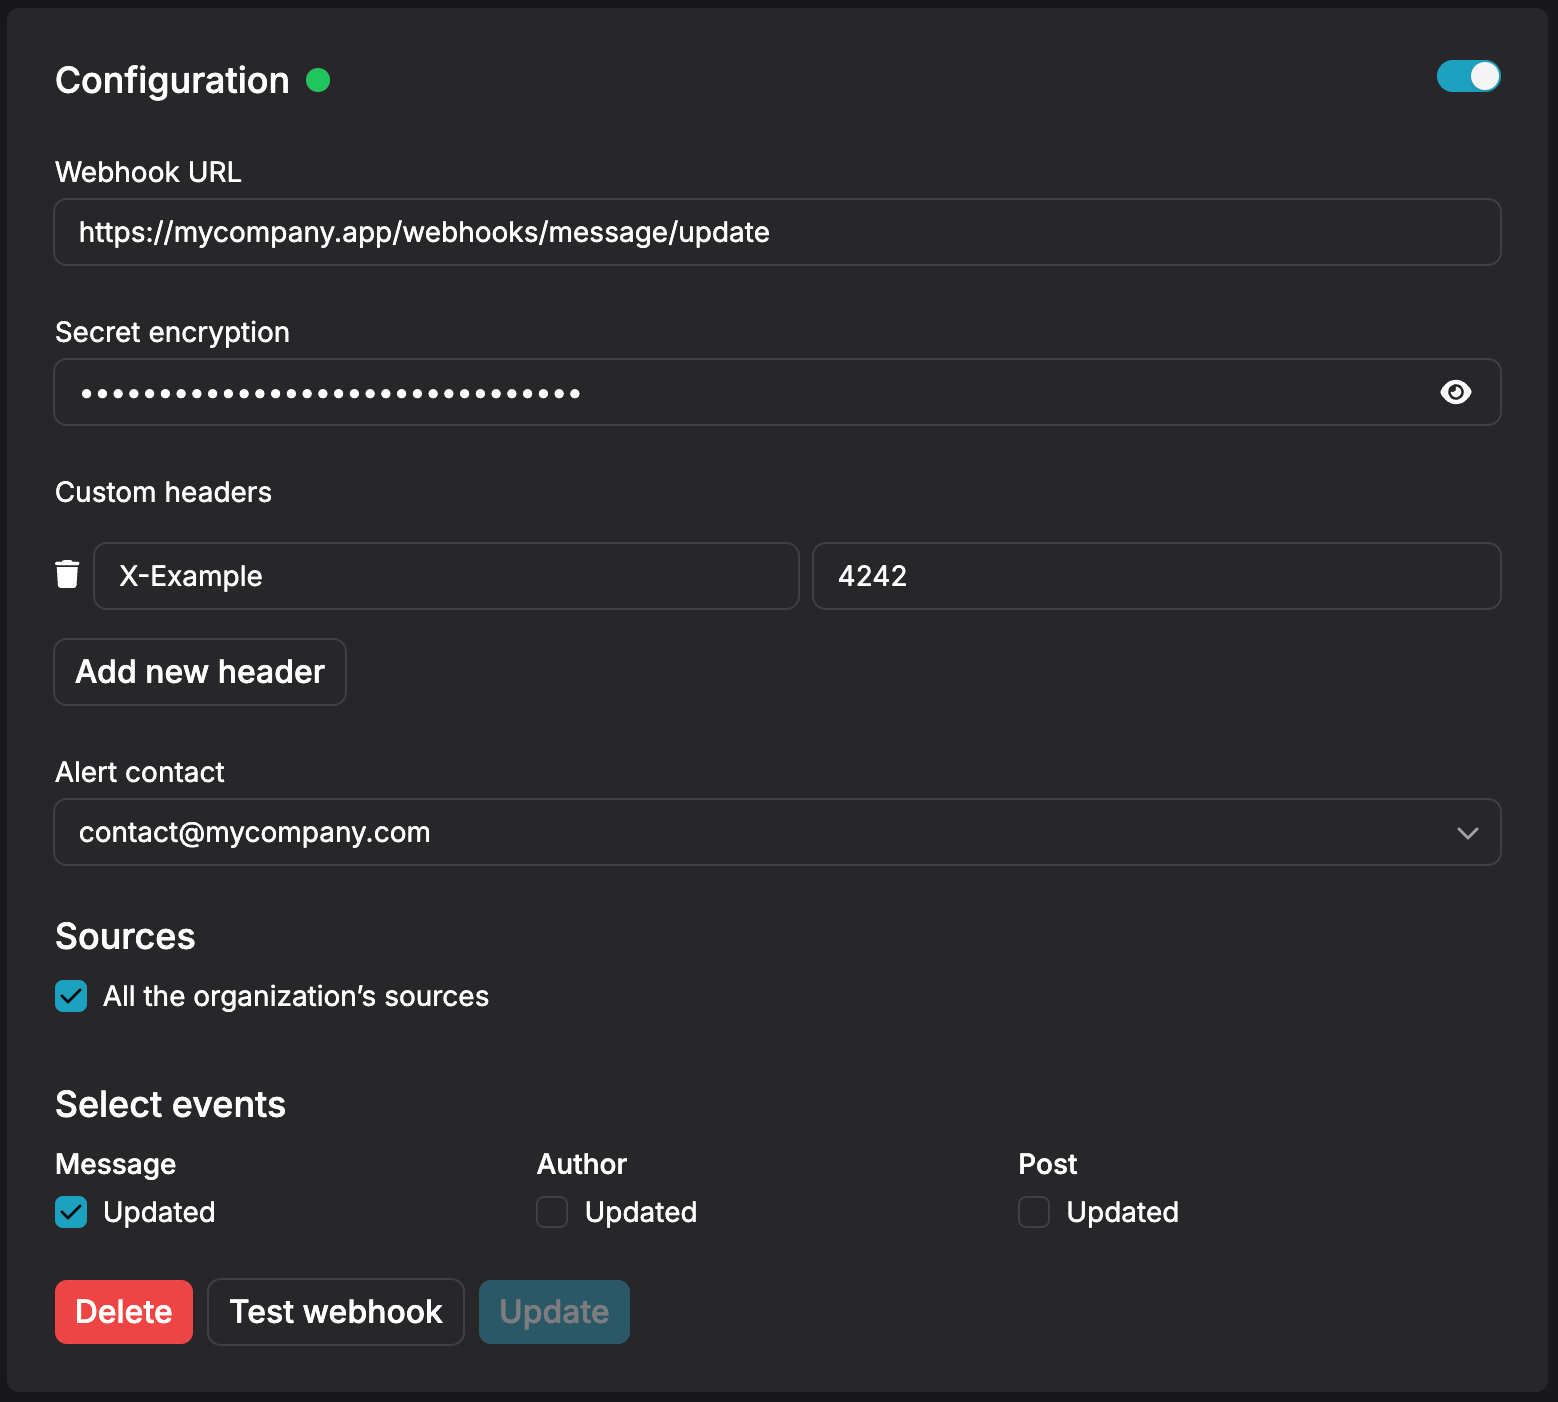
You can configure updates for all event types using the same webhook. Alternatively, you can add another webhook with different paths to handle additional events.